Split, Splash, Loop

My favorite part of Christmas is making gifts for my family, both making my gifts to them and helping family members make gifts for each other. A year ago, as I helped my daughter pack her apartment and move, I noticed that the quilt I made for her when she was ten was showing the effects of years of use and love. And so the process to create a new quilt began.
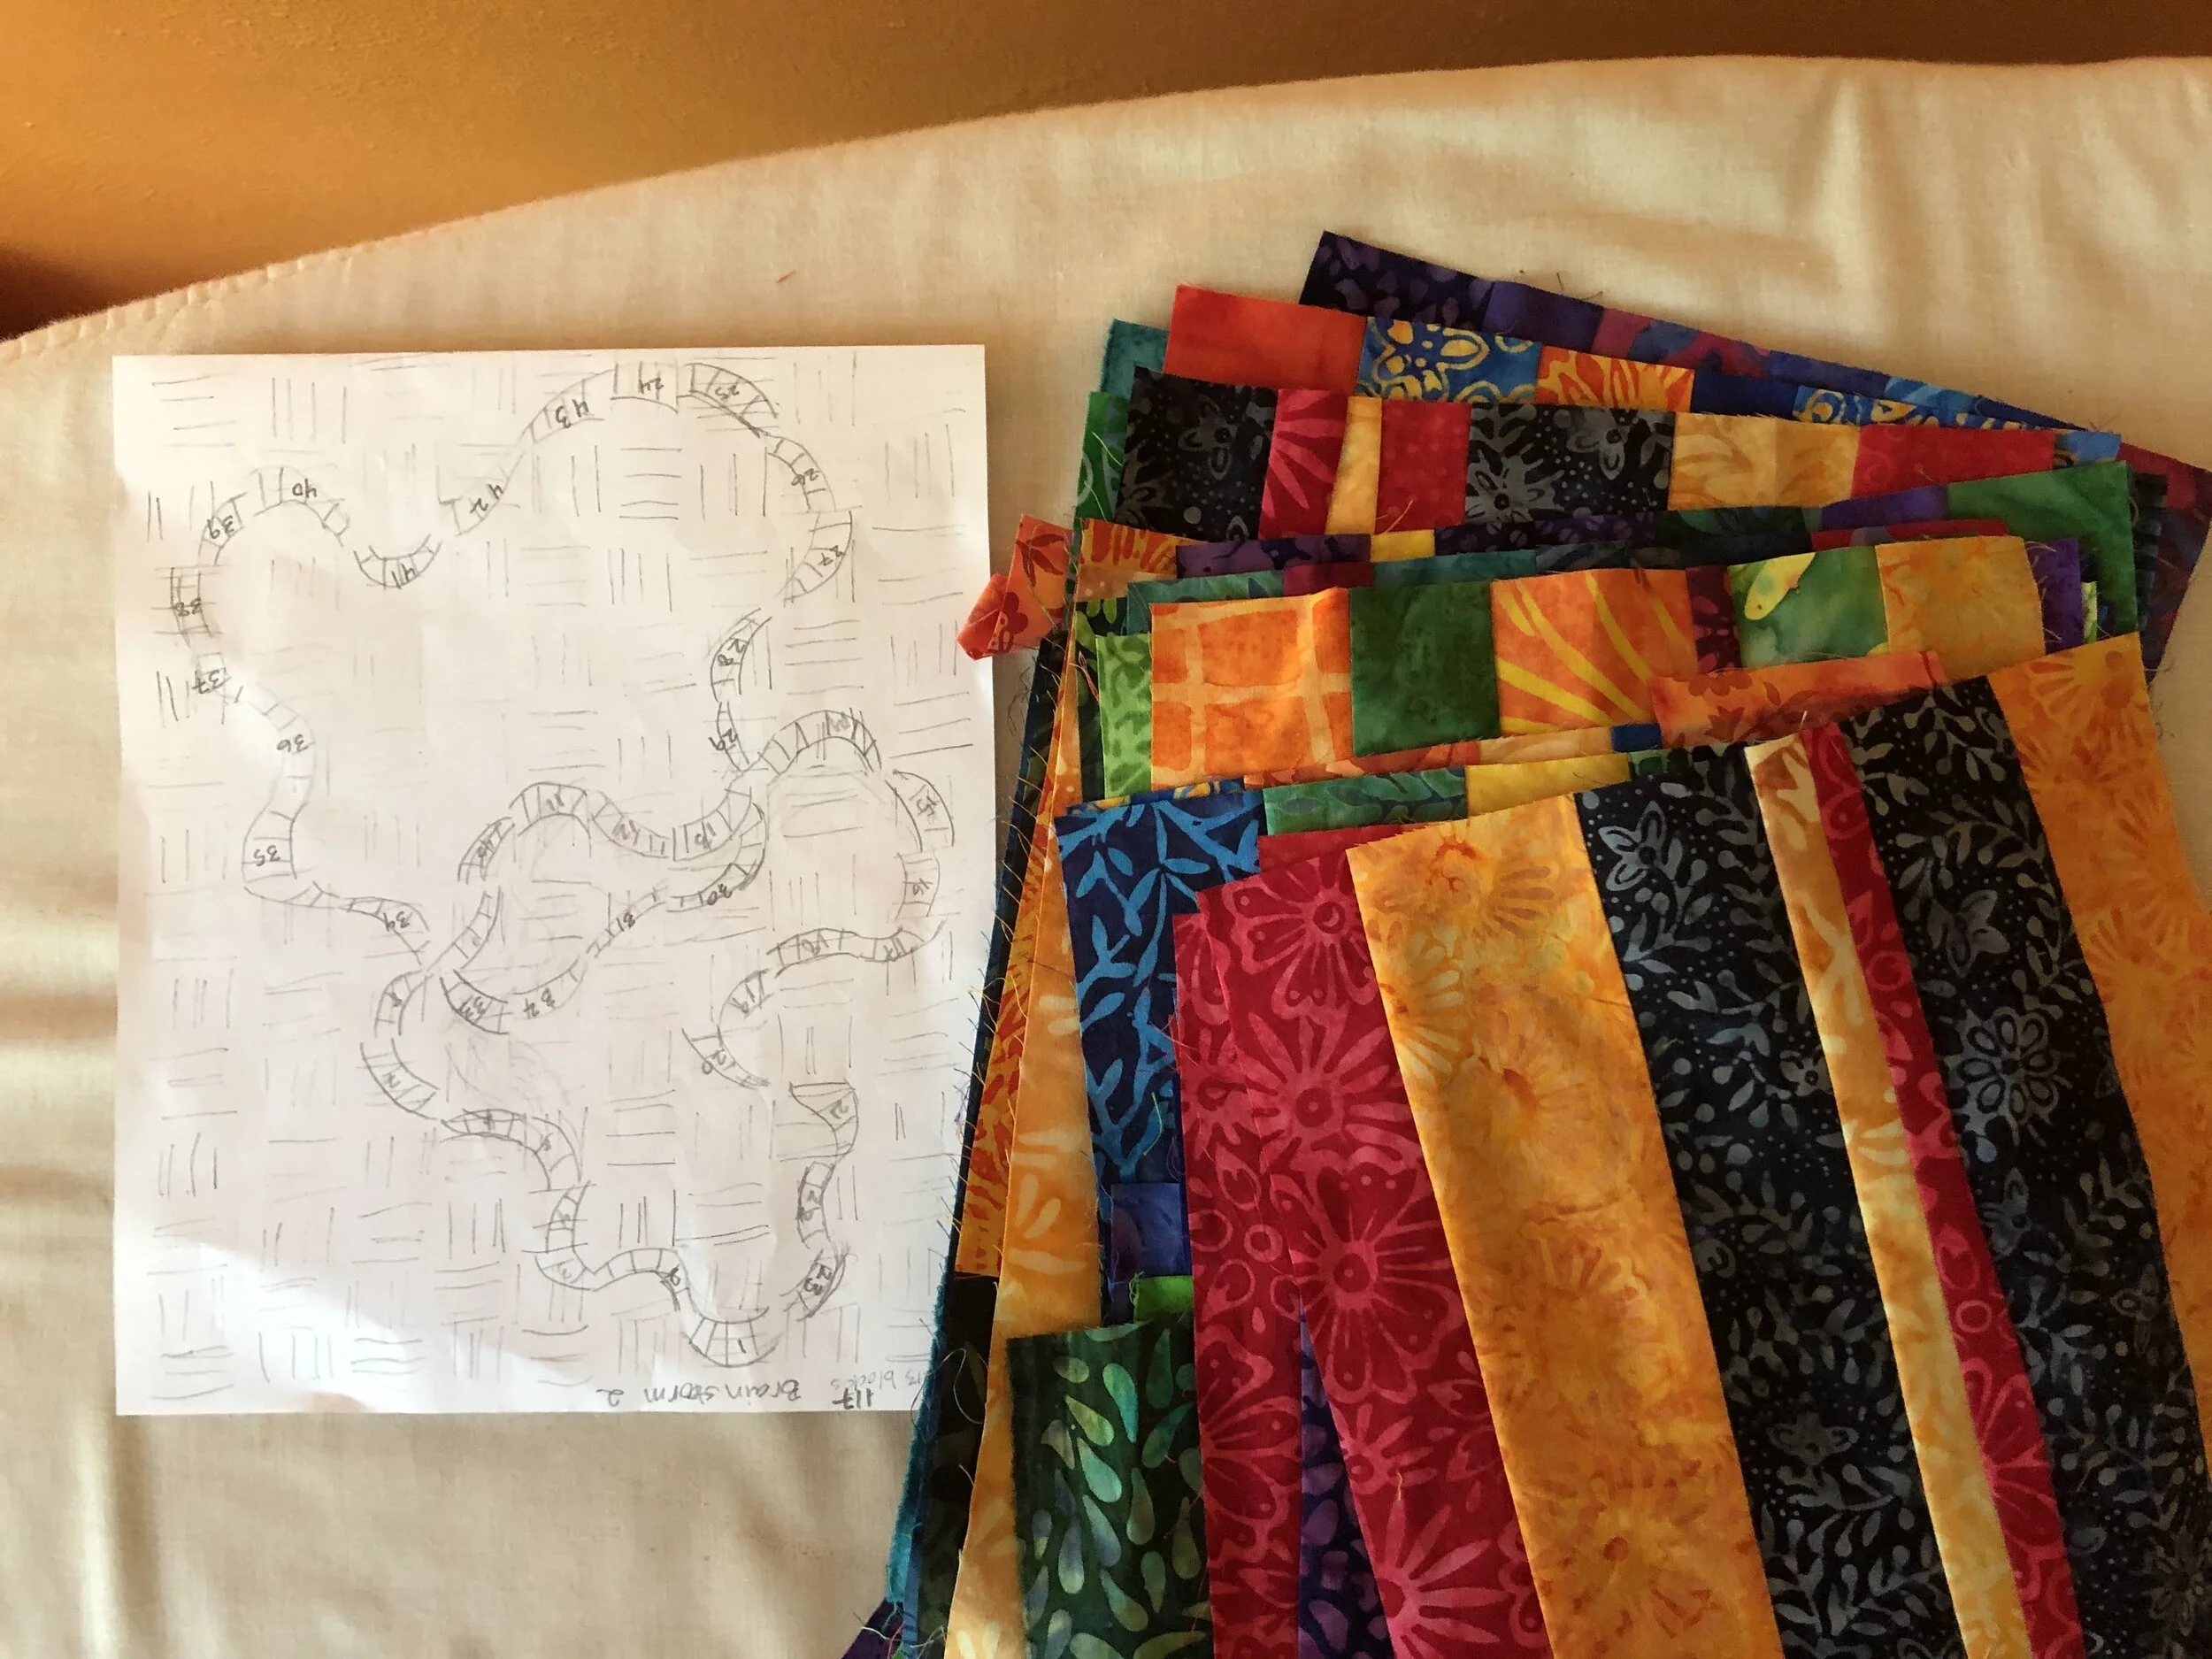
We spent January compiling a Google slideshow of inspiration: quilts by other quilt artists (especially Nancy Crow, Cindy Griselda, Diane Hire, and Alicia Merrett), potential quilt block patterns, piles of fabric colors and patterns, and finally sketches and sample blocks. Inspired by improv quilting and the Split Rail Fence quilt block, I made a quick sketch on a scrap of paper. This sketch became the anchor for the project. I expanded the sketch into a quilt size plan.


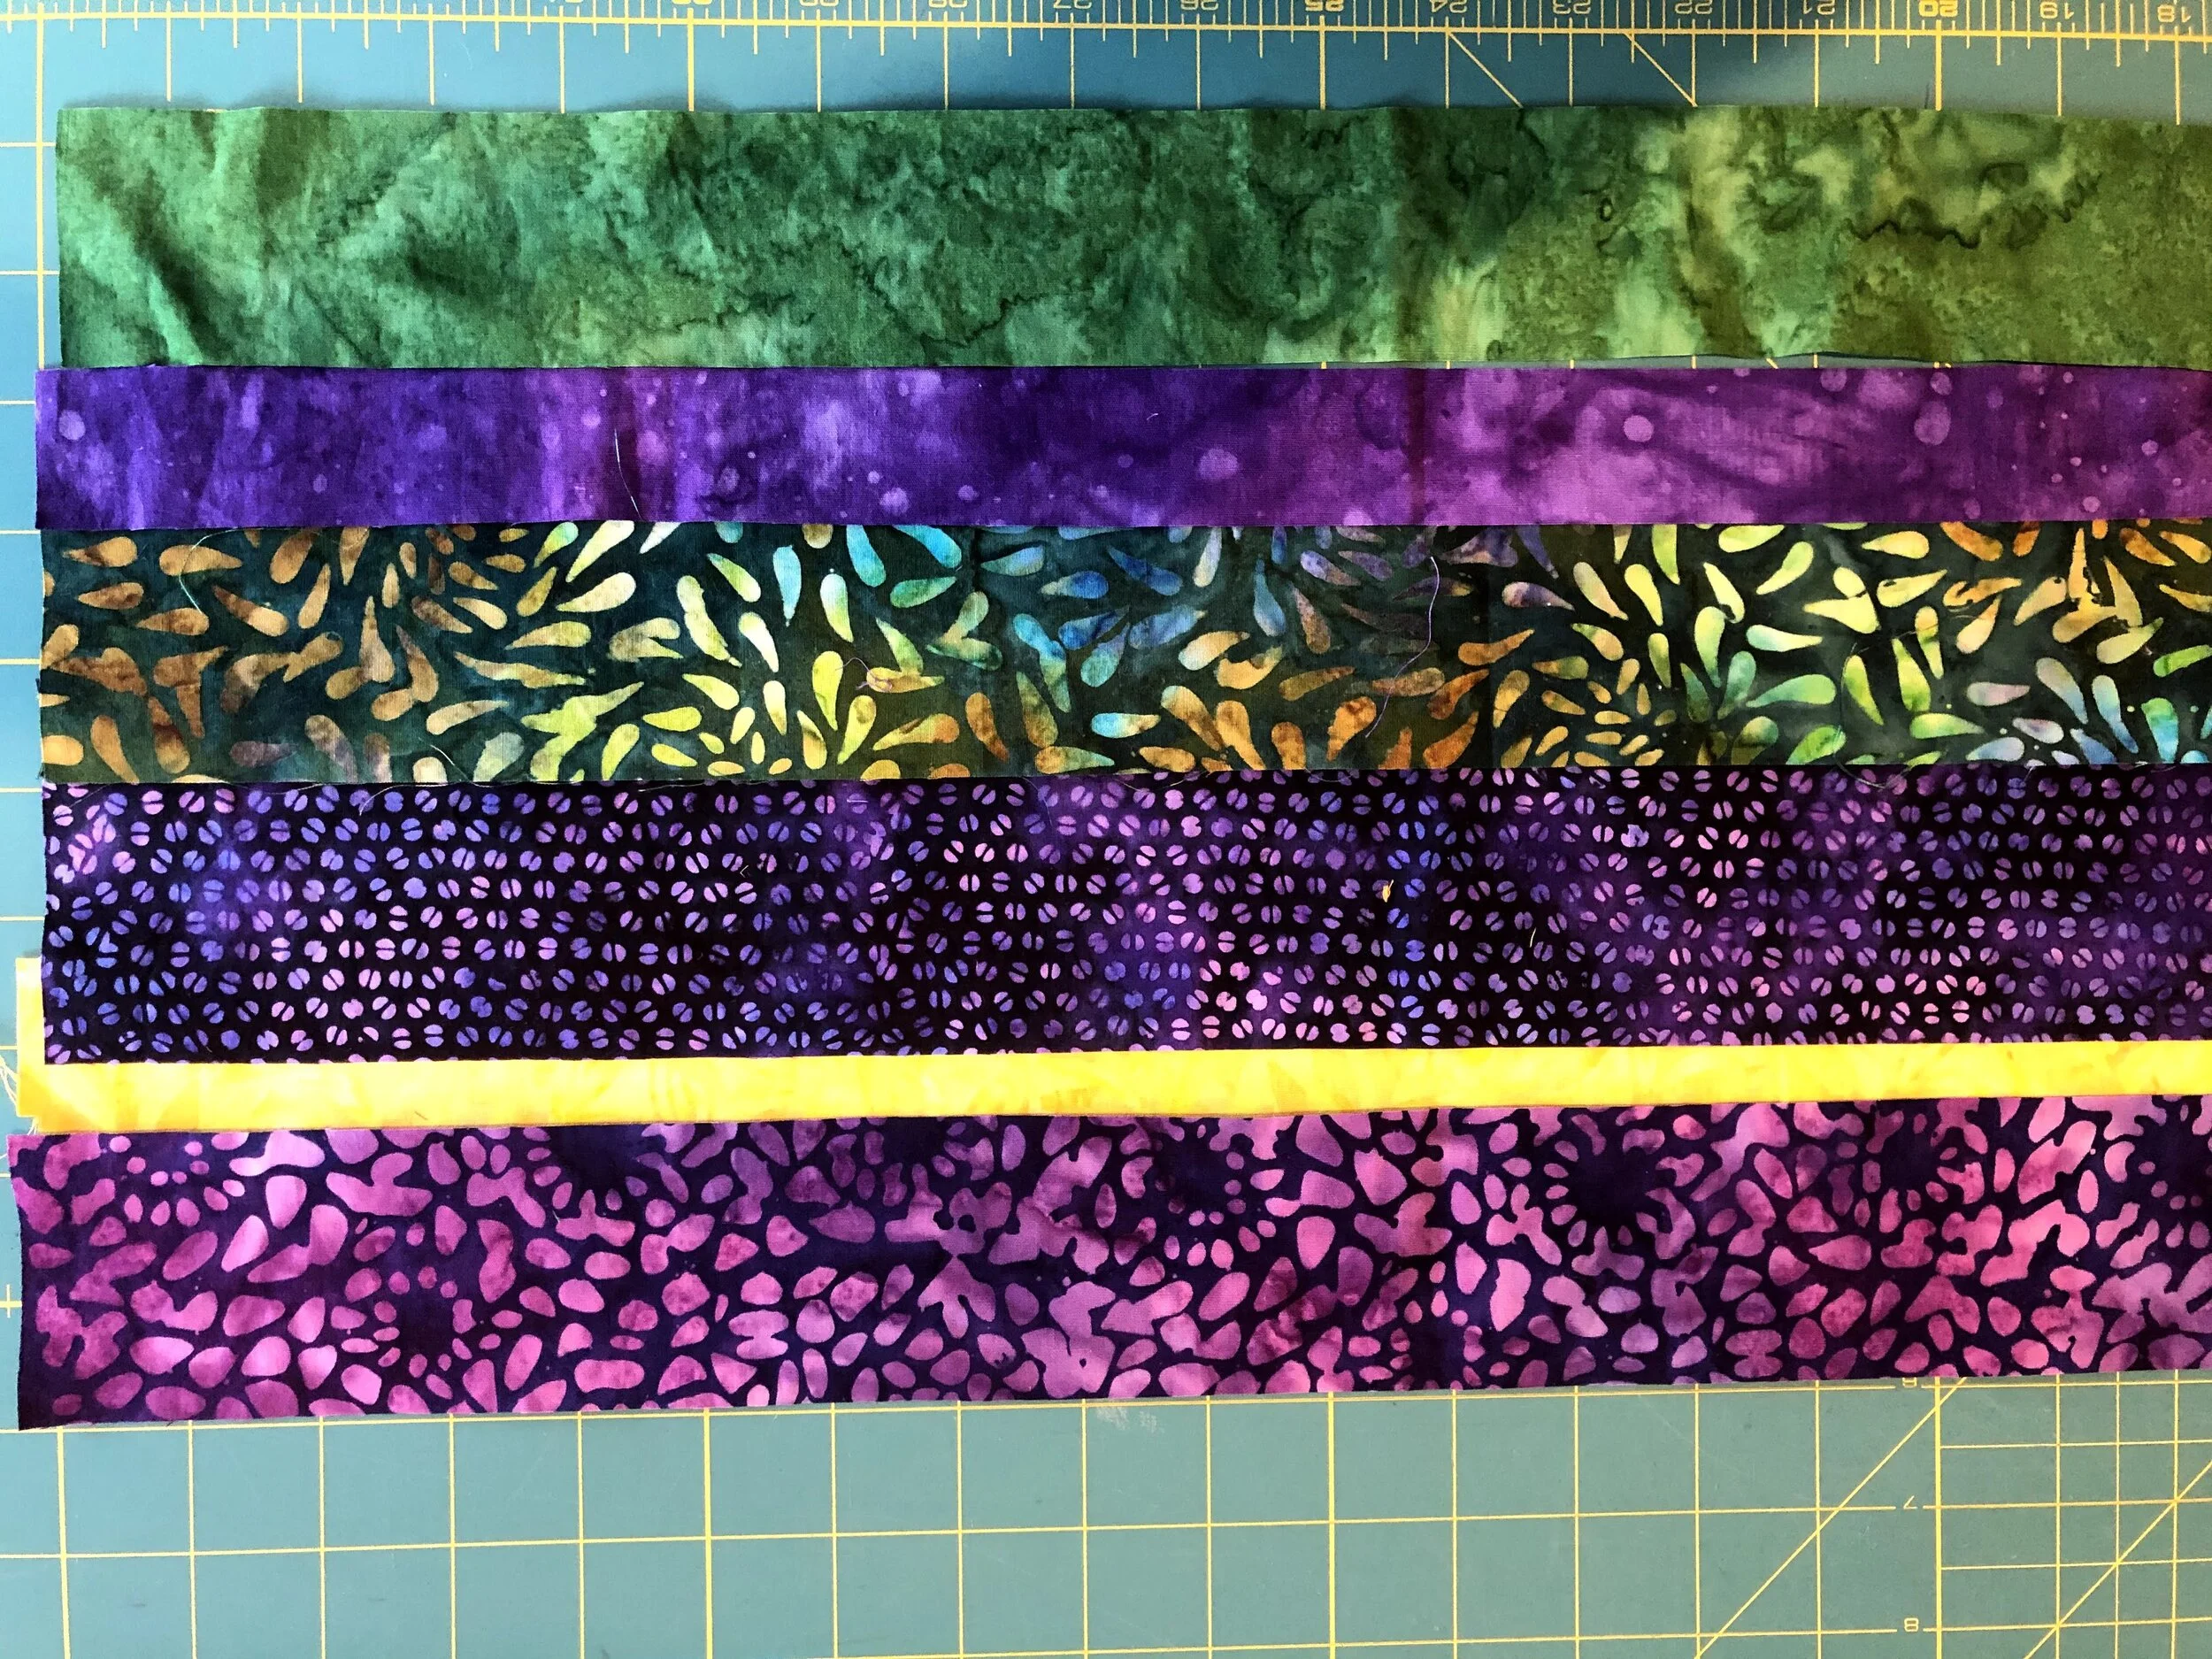
We narrowed down the fabric palette to include only batiks and mostly fabrics that read as monochromatic (though not solid). When my favorite source of batik fabric had a sale, we enjoyed acquiring more fabrics.
A little experimentation led to the first set of stripes. We preferred the side with gentler waves. More experimentation led to streamlining the process. I soon had a pile of strips of each fabric in at least three widths. I was able to pull from the pile to mix and match combinations. As I completed each set of stripes, I would cut one block to hang on my design wall. Sharing my sewing studio with my pandemic online classroom resulted in piles across every surface. At times, the only path across the floor required walking across piles of fabric. But the bold, happy fabric and working on the quilt kept me sane during the crazy of learning multiple new tech skills related to teaching online.


At summer’s end, I started cutting the sets of stripes into blocks. Placing an old duvet cover on the freshly vacuumed garage floor allowed my friend and I to wear masks and work on opposite sides, arranging blocks. Once the first round of arranging was complete, we stood on opposite sides of the quilt, slowly rotating around the entire perimeter, swapping and moving blocks. Next, we pulled out the ladder and took turns looking through a door peephole to better see the “Big Picture”. Whoever was on the ladder would direct the one below in swapping and adjusting blocks. Once we were satisfied, we pinned the blocks to the duvet cover for the move inside.
The quilt spent the next three months spread across my living room floor. We created little paths around it or occasionally tip-toes across it in sock feet, avoiding the pins. During this time, different fabrics auditioned for the loops. Through trial and error, I figured out how to cut the blocks and insert the loop fabric. Luckily the plan had never been for the loop to be smooth and perfectly connected.


With the blocks finished, it was time to assemble the top. This step is always quick and the results are exciting. Soon the top was back on the living room floor trying to tell me what border it wanted. After laying out fabric for several options and consulting by text and photos with artistic friends, the plan came together. Again the actual process went surprisingly quickly, compared to the time spent developing the design. Pressing and thread picking took longer than expected.


With the top fully assembled, it was time to design the backing. The fabric I had purchased for the job was the perfect size- before adding the border. So it was time for creative problem solving. With masks on and back in the garage, which had been transformed into an official dye studio, my friend and I again arranged, swapped out, and rearranged fabric. During one run to my sewing studio to grab more fabric, she made a quick sketch on the back of a receipt in her purse. It became the design inspiration for the backing. The broken-up stripe matched the feel of the quilt top.


With the top and backing each complete, it was time to sandwich, baste, and quilt. So I rolled up the rug, taped the backing to the floor, smoothed out the batting, spread out the quilt top and spent a couple hours listening to Christmas music while I basted the layers together. Since it was across the main travel path of the house, I made, then burst a blister, working until the job was done.


I warmed up my machine quilting skills as I quilted around the intersecting loops. Then the quilt returned to the living room floor to tell me what pattern for the rest of the quilting. With a design in mind, the quilt and I returned to the studio. Initially I would use my finger to trace a path through one or two blocks, then sew. But soon I realized I needed a bigger vision to ensure I didn’t trap myself with no way to get to the next section. I devised and refined a system of pinning little slips of paper with numbers and arrows to direct my path. The time spent tracing a path with my finger and placing the numbered slips paid off when at the sewing machine. Once the quilt was all bunched up and swiveling around through the arm of the sewing machine, I quickly became dizzy and disoriented. The numbered slips with their arrows kept me moving smoothly from block to block. And quicker than I expected, the quilting was complete.


Blocking large quilts is always a challenge. Using multiple large cutting mats, several quilt rulers, stacks of books for weight, and the seams of our hardwood flooring, I managed to square the quilt (I hope). I always forget how much longer the perimeter of large quilts are compared to wall quilts. Three hours later and later at night than was sensible, the binding was complete. And WOW, the quilt was looking great.
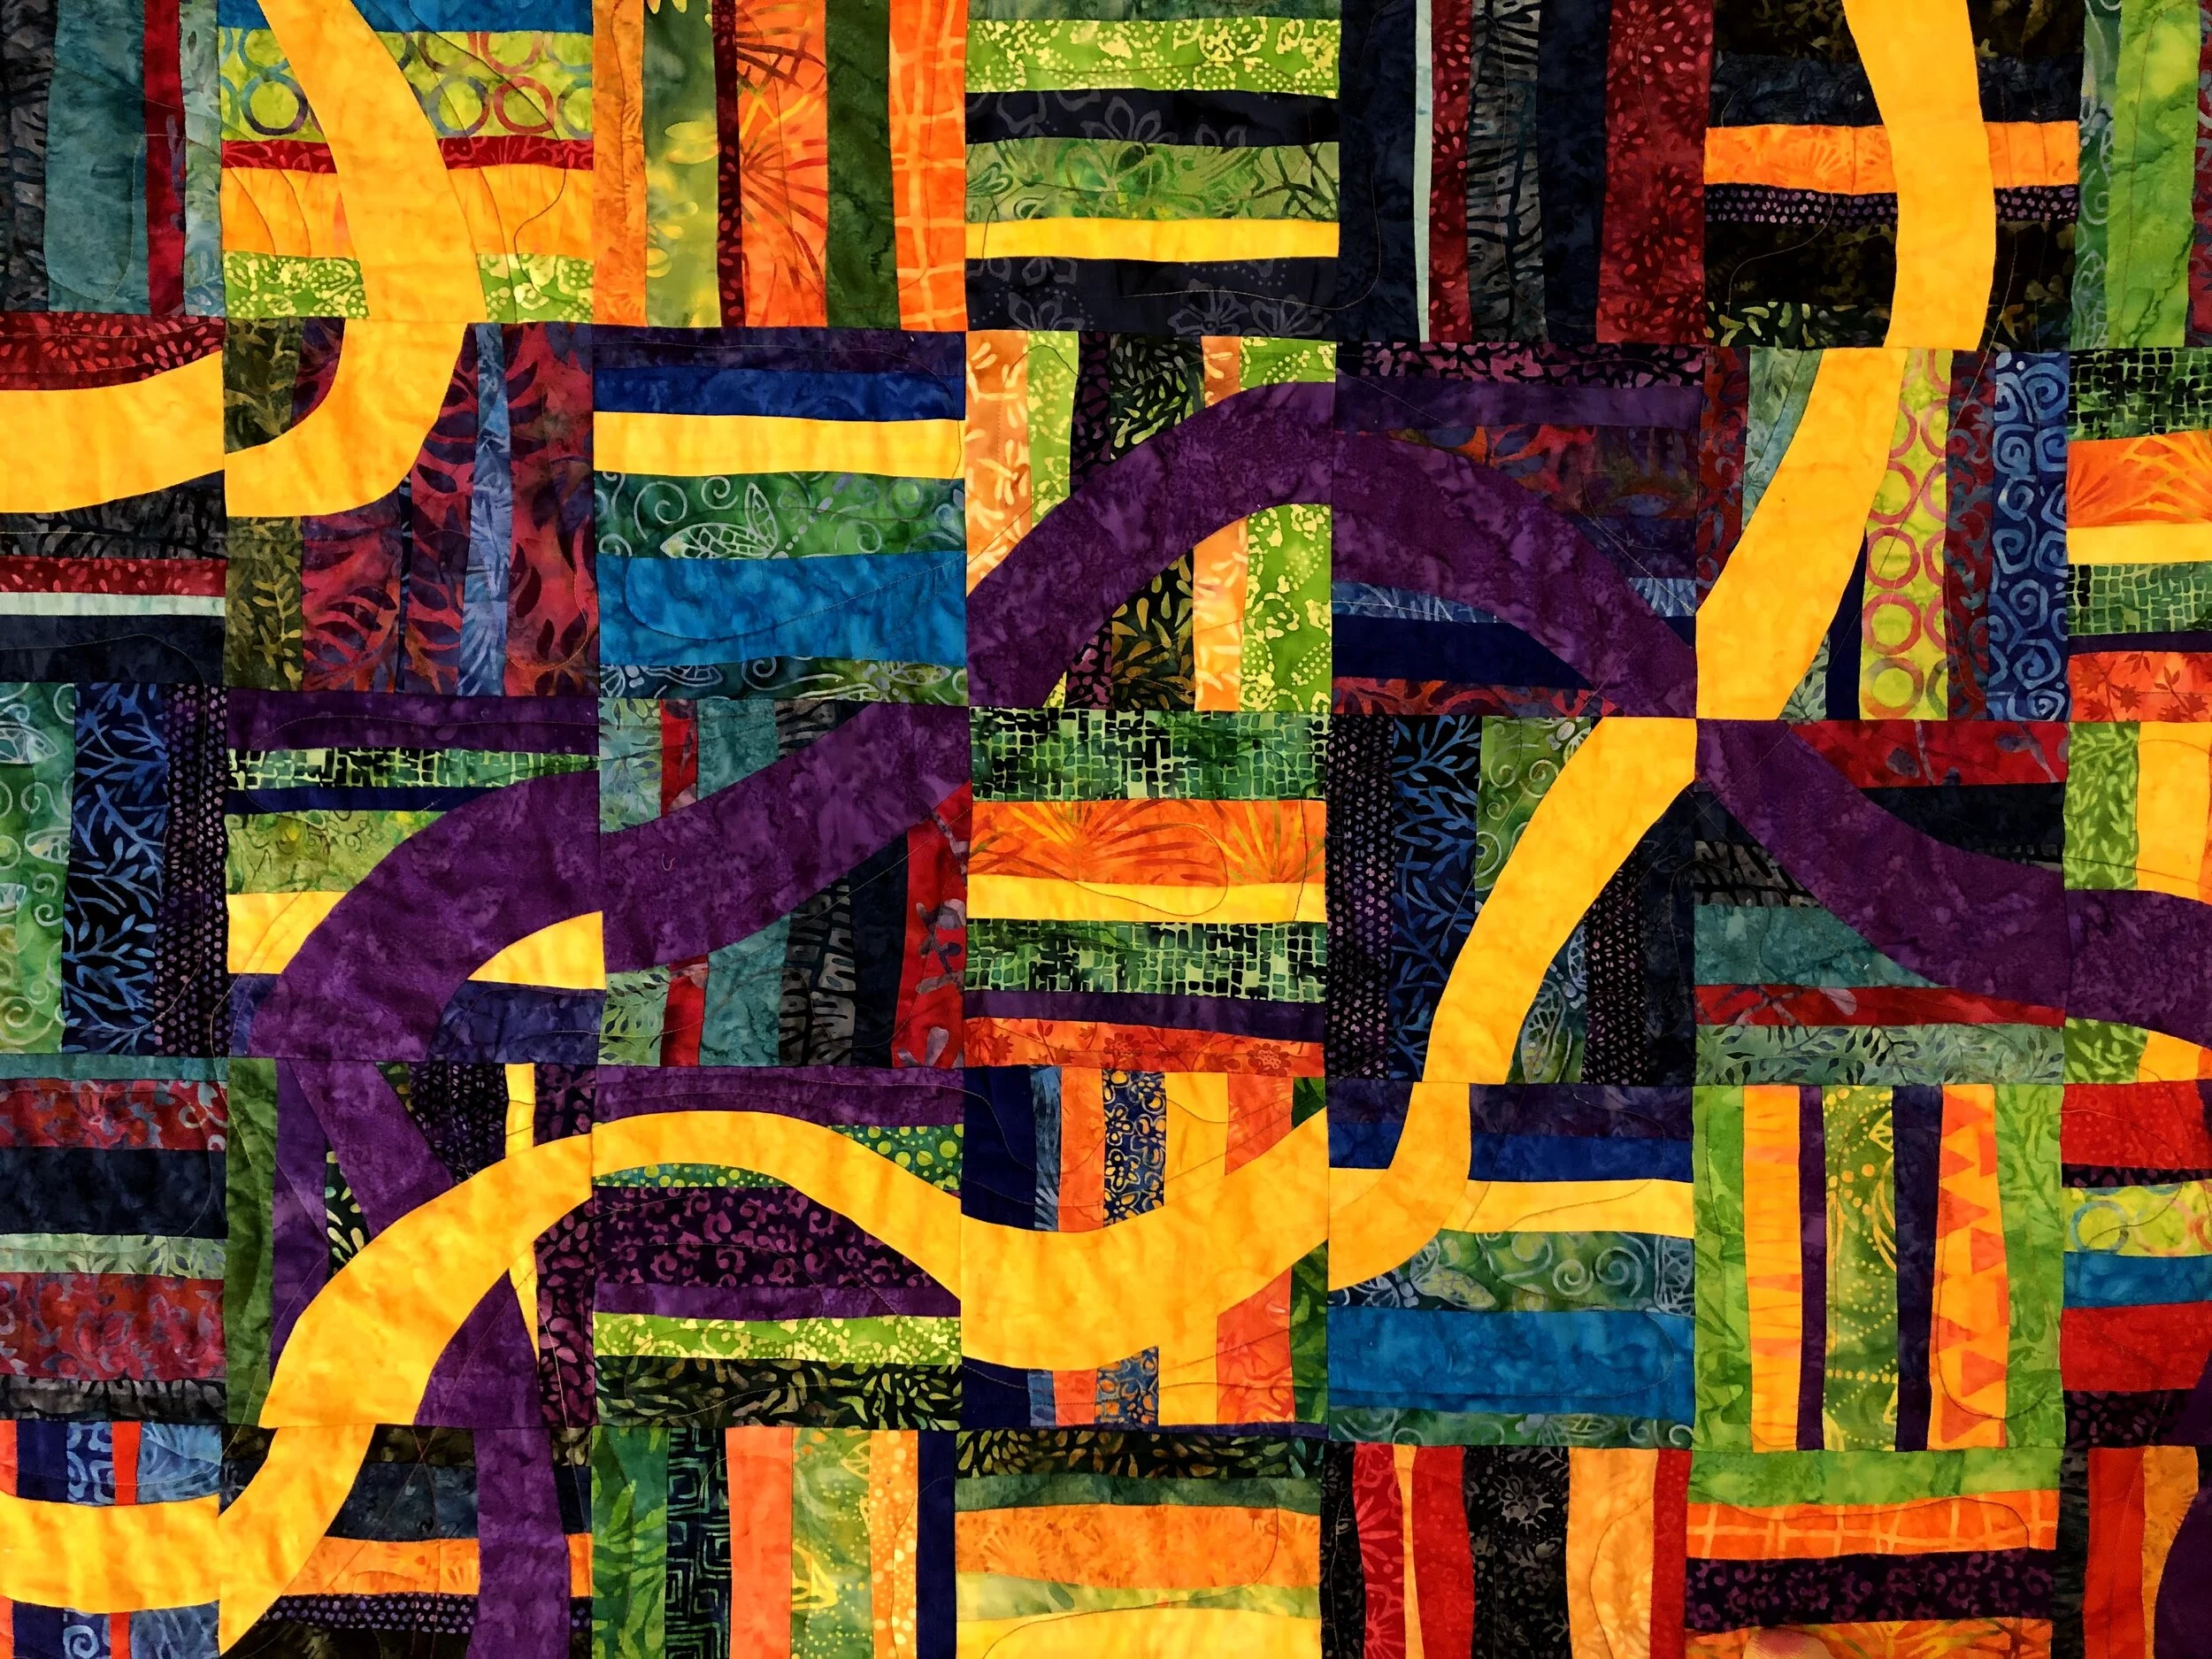
Despite having auditioned various titles for the quilt while creating the border, quilting, and binding, I hadn’t found the right title. Finally, my husband had me list random words that applied to the quilt. From these we pulled Split, Splash, Loop.
Split Rail Fence
Splashes of color
Loops that intersect
The label needed to be as wonky and colorful as the rest of the quilt. And with the final knot after appliquéing the label to the backing, the quilt was complete!


After careful packaging in a sturdy box, we shipped the quilt across the country, with extra insurance and many prayers. I can’t describe the sense of relief I felt when my daughter sent a photo of the box looking in good condition. Watching her open the box and discover I had actually totally finished her quilt was one highlight of our Christmas Day Zoom celebration. Now she is wrapped in our creative collaboration and my love through Zoom calls and chilly nights.
As my friend said when she came to see the final quilt, this quilt with all its wonkiness and disconnects that come together, seems appropriate for 2020. Creating this quilt brightened my pandemic year.
With the completion of this quilt, I head into 2021 with swirls of new quilts and other projects dancing through my head and leaking out into creative chaos which spills across my house.